Wednesday, August 24, 2011

Begin An Advent Tradition

Advent candles 2008

What?  It's only August and you're talking about Advent already?

You betcha!

The reason?  I want you to have plenty of time to order these wonderful Advent books that our family has enjoyed for the past nine years. 

Jotham's Journey, Bartholomew's Passage, and Tabitha's Travels by Arnold Ytreeide are all beautifully intertwined stories that lead up to Jesus' birth.  Each character is lead on a different journey full of adventure and nail-biting cliffhangers.  Your kids will hardly be able to wait for the next day's reading.

Even though our older children have heard these stories numerous times, they still look forward to hearing them again every year.  And for our younger ones, it's a brand new story as they grow each year and begin to understand the beauty of Advent.  It's become a wonderful tradition in our family....one that we hope they'll continue in their own families.

You begin reading the story on the fourth Sunday before Christmas, and read a section each day until you finally arrive at Christmas morning...the reading of Christ's birth.

Our first night of reading, we sit around the table with big mugs of hot chocolate.  It is such fun time for our family.

On Christmas morning, we eat breakfast first...must feed the vultures.  Then, we do nothing else, not even open presents, until we've read our final Advent story.  It really sets the tone for what Christmas means to our family as Christ-followers, and why we celebrate His glorious birth.

If you're not already reading these, I highly recommend them.  If you can only order one, begin with Jotham's Journey, and try to collect one a year until you've acquired all three. 

Your family will love these, and the time spent reading together is a time to be cherished!


"With these books you will begin a rich tradition of nativity celebration in your household."


*This post contains affiliate links.

Photo Credit

Tuesday, August 23, 2011

Quick Tip: Snack Time

one of my favorite things.

Snack time doesn't have to be a production.  A handful of raisins, a cheese stick, or a handful of nuts are nutritious, easy choices. 

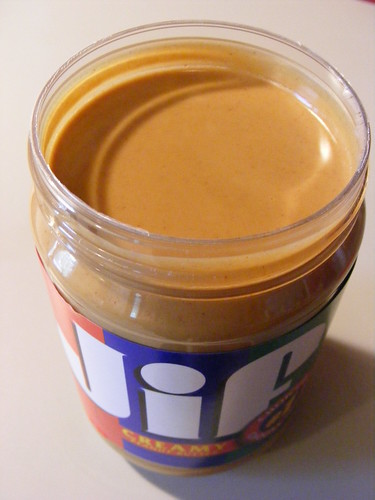
It can also be as simple as diving a spoon into a jar a peanut butter.

Peanut butter on a spoon packs a substantial, nutritional punch.  Just 1 tablespoon of peanut butter has about 90 calories, 4g protein, and 1g fiber. The protein in peanut butter helps contribute toward your daily protein needs, and it provides energy while helping to keep the kids feeling full until meal time.

It's one of our kids' favorite snacks!  And mine too.  :)

Photo Credit

Sunday, August 21, 2011

The Perfect Biscuit

And might I add...the EASIEST too!

The Perfect Biscuit

White Lily Self-Rising Flour
Heavy Whipping Cream

That's all -- just two ingredients for light and fluffy biscuits!

Mix about 1 1/2 cups of self-rising flour per 1 cup of heavy cream. Add flour as needed, being careful not to add too much, or the biscuits will be dry and heavy, instead of light and fluffy.

Knead lightly on a floured surface and roll out to 1/2" thick.

Then cut into rounds with a glass or cookie cutter dipped into flour.

Bake at 450 degrees F for 10-12 minutes, or until golden-brown on top.

Bridesmaid Fun


Last weekend, Cheyenne took her bridesmaids to be fitted for their dresses.  With the help of Rachel, their friend and sales associate, they were able to order their dresses for the upcoming January wedding.  Two of her bridesmaids are not pictured here; one lives out of state, and the other was out of country.  They were missed!

The girls had a wonderful time together, and followed the fittings with a girls' luncheon. 

Photo from L to R:  Amy, Rachel, Shelley, Cheyenne (the bride), Celeste (Maid of Honor and sister), and Bethany Bridesmaids missing in action:  Cristen and Alex

Friday, August 19, 2011

How To: Homemade Refried Beans

Homemade Refried Beans

We love beans.  We eat a lot of them because they're yummy, healthy, and CHEAP! 

We especially eat a lot of Refried Beans.  We make a 2 lb. bag of Pintos every two weeks. 

Did you know that 1 cup of Refried Beans is low in Saturated Fat, and very low in Cholesterol? It is also a good source of Protein (13g), Vitamin C, Magnesium, Phosphorus, Potassium and Manganese, and an excellent source of Fiber (12g...that's 49% of your Daily Value).

So what do we do with all those beans?  We make Quesadillas, Bean and Cheese Burritos, Bean Dip, Tostadas, and Touch Down Taco Dip.  We also use them as a side to enchiladas and tacos.  The kids even like to eat them in a small dish with cheese on top.  Having them on hand makes for SUPER EASY "go to" lunches and dinners. 

Let's get cookin'.

Here's what you'll need:

1 lb bag Pinto beans
1 stick butter (or any other fat such as bacon fat or lard...but everything is betta with butta!)
Salt, Pepper, and Garlic powder to taste


First, sort your beans.  Place a small pile on the counter at a time and pick out any dirt clots, rocks, or anything else that doesn't resemble a Pinto bean.


See that big, ugly clump of dirt?  Now aren't you glad you sorted first?

Here are the gems I found in my last bag.  El Grosso!


 As you're sorting your piles, throw the beans in a medium to large pot.


Now, give the beans a quick rinse....pour out water, and then refill pot to about an inch or two above the beans.


First stage done.  Go relax and let those babies soak all night.  (Quick soak method below)

When you're ready to begin cooking the beans, pour out the soaking water and refill with fresh water, again, 2-3 inches above beans.  I usually use hot water just to give the heating up process a jump start. 

Bring beans to a boil.  Be careful not to let those beans boil over while you’re not looking…the mess is a doozy!  But I wouldn't know about that.


Let boil for a couple of minutes and then reduce heat to low.  Simmer for 2 to 3 hours.  Stir occasionally and add water if necessary.  If you let all the water evaporate, your beans will burn, your pot will be lots of fun to clean, and your house will not smell very pleasant.  But I wouldn't know about that either!

When your beans are done, they will look plump and feel soft.  Drain some of the water.  Not all of it, though...about like this. 


Now pour the beans in a food processor.  If you do not have one, or you just don't feel like luggin' the huge thing out, use a masher.  Add butter, about 2 teaspoons of salt, a little pepper, and a little garlic powder.  If you're using a masher, be sure and stir the beans, 'cause those mashed beans stick to the bottom.


Process away!  Once you’ve reached your desired consistency, it’s time to taste.  Does it need more salt?  Probably so.  Maybe a little more pepper and garlic?  I don’t know…they're your beans.  Taste them!

Each time you need to add more seasoning, pulse or stir to blend.

Once you’ve got them all nice and seasoned, pour them into a container to cool.  Once cool, seal tightly.  Will store in the fridge for two weeks. 

So, you see, they’re not actually REfried, but that's okay...they still taste amazing!  But if you want to "re"fry them, have at it.

Here's the printable version:

Homemade Refried Beans

1 lb Pinto beans
1 stick butter
Salt, Pepper, and Garlic Powder to taste

Sort beans and place in medium to large pot.  Rinse with cool water and drain.  Refill to about 1-2 inches above beans.  Let soak all night.  If you don't want to wait until the next day, use the quick soak method.

*Quick soak method:  After rinsing beans, refill with hot water, and bring to a boil.  Boil a few minutes and then turn off the stove.  Let sit an hour...resume at this step below.

Drain soaking water and refill to about 1 inch above pot.  Bring to a boil.  Reduce heat and simmer for 2-3 hours.  If you're not sure when they're done, taste a bean to make sure it's very soft.

Drain some of the water, but not all of it.  Pour beans into food processor and add butter, about 2 teaspoons of salt, some pepper, and a little garlic powder.   Pulse (or stir if using a masher) to incorporate seasoning and butter.  Pulse until you get the desired consistency.  Taste often to check for seasoning.  Trust your instincts...you know what taste good to you!

Pour beans into air tight container.  Allow to cool and store up to two weeks.  These freeze well too.   Enjoy!

Photo Credit (top)

Wednesday, August 17, 2011

Fun Reading Games

Looking for something new and fun to keep the little ones busy while they're cooped up in the house because it's TOO scorching hot to go outside? 

Yep...me too!  That's why I'm glad to have found this....

Three of my kids have already been enjoying these fun FREE reading games.  And it's just enough to change up the old routine, and still keep their minds busy. 


If you have beginning or early readers, click on the photo, and give it a try!


*I receive a little compensation per sign up.

Tuesday, August 16, 2011

Quick Tip: Children's Puzzles

Keeping all those puzzle pieces to the correct puzzle is made easier by simply numbering the puzzle itself.......


And then numbering each individual puzzle piece to match.


What are your favorite tips for keeping puzzles organized?

Sunday, August 14, 2011

I LOVE Swagbucks

Did you know that you could be earning FREE Amazon gift cards simply by doing toolbar searches that you probably do daily anyway? Swagbucks has been a huge blessing to our family. I have purchased many Amazon gift cards that I immediately put into my Amazon account. I was able to buy most of my home schooling material this year for FREE thanks to Swagbucks. For just 450 Swagbucks, you can snag a $5 Amazon gift card. Of course, there are many other things you can buy (like Paypal cash and Starbucks gift cards), but I stick with my trusty Amazon gift cards.


Here's how it works. Click on the image above and sign up for Swagbucks. You will download a simple Swagbucks toolbar and that's it! Once your toolbar is up, begin using it for your daily searches.

There are other ways in which you can earn Bucks as well. You can do daily polls and surveys. You can also try promotional offers and earn big Bucks. Recently, I signed up for a 30-day trial of Netflix. Our family enjoyed a months worth of fun movies and documentaries, and I enjoyed 1000 Swagbugs! Cha-Ching!

Here are just some of the gift cards I've redeemed. I've got two more waiting to be delivered into my account.

$5 Amazon.com e-Gift Card

Go up to the link above and sign up now....you won't regret it!

Saturday, August 13, 2011

Mama Told Me There'd Be Days Like This

Lets Paint!

It's a beautiful, lazy Saturday morning. Mommy and Daddy are relaxing, kids are playing, older girls are gone getting fitted for bridesmaid's dresses, no pressing appointments to worry about. Sounds perfect right?

In our eighteen years of parenting, one thing we've learned is that when it's TOO quiet, it's time to check on the little ones. Our instincts proved correct!

We came upon a scene of total art madness. In our older girls' room, no less. The guilty suspects? Our two, and three year old.  BUSTED!  Where shall I begin?

Sketching pencils strewn about.  Open tubes of acrylic, oil, and watercolor paint all over the carpet.  A "redesigned" abstract painting that Celeste had just painted last night, ruined, courtesy of little sister.  And, of course, Jonathan and Genevieve, covered in paint.

The little sleuths got into the big girls' room despite having a "child safety knob" on the door.  I didn't know whether to be glad the girls weren't home to see the condition of their room, or be furious that a certain, unnamed child didn't put away her painting supplies!

Never fear, Superhero Mom and Dad dove in head first and conquered the chaos.  The girls will neeeever know what happened.  Well, except for that redesigned painting....and the paint on their sheets, and the empty paint tubes, and......

It's days like this that I am eternally grateful for my handy dandy carpet cleaning machine, which got ALL the paint out of the carpet.  It definitely works overtime in our home.  It's just the nature of having children, especially a lot of children, that messes like these are a regular, and expected,  part of our life!  We just clean them up, and laugh about them later....much later.

Photo Credit

Wednesday, August 10, 2011

Free Chips and Queso

Would you like....


Simply click on link above and print your FREE chips and queso from Chili's!

Sunday, August 07, 2011

Under Construction


Well, I'm finally doing it. I'm redesigning my blog. New look, new name, new domain. GULP!

Things may look strange and unfinished around here a while, but I hope to complete the job quickly.  It will be a process, so please bear with me!  :)  Don't forget to check back....

Monday, August 01, 2011

Amish White Bread


This is hands down our favorite white bread recipe.  Even though we mainly bake whole wheat bread, we can't resist this delicious, sweet bread.  Give it a try!  You will love it!
Amish White Bread
Ingredients
  • 2 cups warm water (110 degrees F/45 degrees C)
  • 2/3 cup white sugar
  • 1 1/2 tablespoons active dry yeast
  • 1 1/2 teaspoons salt
  • 1/4 cup vegetable oil
  • 6 cups bread flour
Directions
1.    In a large bowl, dissolve the sugar in warm water, and then stir in yeast. Allow to proof until yeast resembles a creamy foam.
2.    Mix salt and oil into the yeast. Mix in flour one cup at a time. Knead dough on a lightly floured surface (or in your very large bowl) until smooth. Place in a well oiled bowl, and turn dough to coat. Cover with a damp cloth. Allow to rise until doubled in bulk, about 1 hour.  Rising in a warm oven (turned off) works best.
3.    Punch dough down. Knead for a few minutes, and divide in half. Shape into loaves, and place into two well oiled 9×5 inch loaf pans. Allow to rise for 30 minutes, or until dough has risen 1 inch above pans.
4.    Bake at 325 degrees F (175 degrees C) for 30 minutes. 

Recipe courtesy of The Marathon Mom :)

Saturday, July 30, 2011

Dropping the Ball

big.red.ball.

Do you sometimes feel like you've "dropped the ball" in the midst of the daily demands of mommyhood? 

Whether it's your husband opening up his underwear drawer, only to find it empty...OOPS!  Or you signed up to take a family a meal, only to remember the very moment they're waiting for you to show up at their door! Or forgetting that dentist appointment that you've waited three long months for!  You get the picture.  Sometimes as moms, even we organized moms, occasionally drop the ball.

Recently, I dropped the ball with my one of my older girls.  Our oldest daughter participated in two years of Dual Credit.  If you're not familiar with this program, it allows your high school student to take college courses for free, earning both college and high school credit. 

Well, it was time to begin the enrollment process for our next daughter.  She had already taken the SAT and we were just waiting on scores.  Life had been busy during that time with a difficult pregnancy and then new baby, so I hadn't been paying much attention to dates and deadlines.  While at Bible study one night, a friend mentions something about the Dual Credit enrollment deadline passing.

WHA!?!  "Did you say the deadline has PASSED?"

"Oh, yes, it was last week.", said my friend!

At that moment, I really felt like I had dropped the proverbial ball.  How could this be?  School doesn't start until August and it was only March.  Surely I can still get her signed up.  But, after lots of calls and emails, hope was lost.  Not only did I miss the deadline, but the enrollment process was for the entire year....not just one semester.  My daughter will miss an entire year of Dual Credit.  Not only would Dual Credit have eased some of my teaching responsibility, but my daughter was looking forward to trying her hand at a couple of college courses.  I felt absolutely terrible and I beat myself up for days over this.

Until.....

I was reminded that God is sovereign.  That God directs our steps.  That if I truly believe that "all things work together for good" (Rom 8:28), then I should trust that there was reason I dropped this ball.  Perhaps it just wasn't God's plan for Celeste to attend college this year.  Maybe she wasn't ready.  Maybe she was being protected in some way.  I don't know, and perhaps I'll never know.  What I do know, is that if it was His plan for her to be there, we wouldn't have missed the deadline. 

My point to this story is not to use life as an excuse to ignore our responsibilities, or miss important deadlines, but as a reminder to not beat ourselves up when we occasionally drop the ball.  If we understand that God is at work in all circumstances, we can rest in this knowledge, learn from our experiences, and move on to other tasks....like those "whites" so my husband will have clean underwear for Pete's sake!

As for my daughter, well, she was very understanding...and we'll just shoot for next year.  Will someone please email me in OCTOBER to remind me?  ;-)

Photo Credit

Thursday, July 21, 2011

Flaky Deli Slices

Looking for something new to make for lunch?   Here's a recipe for you.  Everyone loves these flaky, savory slices in our home!  They're fun. Yummy.  And it's not your ordinary sandwich! 

2 pre-made pie crusts
1 cup grated Parmesan
1 pkg pepperoni
6 slices (or more) favorite ham
1 cup grated Cheddar

Preheat oven to 350*

Unroll both pie crusts.  Spread out 1/2 cup of Parmesan on each crust.  Next, layer pepperoni slices over Parmesan, making sure to leave about a one inch space around the perimeter.  Then, place about three slices (or more) of ham over the pepperoni to cover.  Finally, add 1/2 cup of Cheddar evenly over top of ham.

Tightly roll up crusts, being careful to hold everything inside.  Tuck each end under and place on baking sheet seam side down.  Bake for 20 minutes until golden brown on top.

Slice into 1-inch pieces and serve with fruit or carrots.  Serves 6-8 (or more if you're serving fruit/veggies on the side).

Saturday, July 16, 2011

Four Months

Four Months


We've held this precious girl in our arms for four months already!  With each child, the time seems to pass more quickly than I can take in.  Nonetheless, we've cherished every moment with Amelia. 

She's as sweet as can be with her big smile and her vocal nature.  She's a talker! 

She's strong.  Loves to stand and can even sit up almost by herself.  She loves to roll over and she loves the timeless magic of ELEVATION!  She's happiest in the arms of whomever is standing up or walking around.  But we know it's simply because she wants to take everything in.

We love her.  We're thankful for her.  And we pray she doesn't grow up too quickly, though experience has taught us otherwise.  :)

Blessings!

Thursday, July 07, 2011

Engagement

In Case You Haven't Heard.....


THEY'RE ENGAGED!


Greg and I are honored to announce the engagement of Cheyenne and Nathan.  We are all giddy with excitement and ready to begin planning a wedding.  But most of all, we are blessed beyond measure that God has brought these two together to be united as one.  Nathan is every bit the man we prayed for our daughter since she was a baby.  We are truly thankful for His goodness and faithfulness, and look forward to witnessing their lives together. 

Aren't they the cutest?!


(photos taken by Bethany Warren and Robin Klein)

Thursday, June 30, 2011

Cue Feeding

Examining the Evidence for Cue Feeding of Breastfed Infants

Excellent artcle...fairly long, but well worth the read.

http://www.tulipgirl.com/index.php/2010/12/examining-the-evidence-for-cue-feeding-of-breastfed-infants/
ht: Kristen S.

Sunday, June 19, 2011

Cheyenne's Graduation

Cheyenne's Graduation and Recital 2011

                     We're so proud of you, Cheyenne!  Congratulations!


                       Cheyenne and Sophia playing "Beauty and the Beast"
                                                                        
                  Cheyenne and Olivia playing "Wonderful, Merciful Savior"


Taking a bow


Daddy presenting diploma to our first home school graduate


Gramie, Grandpa, and the Graduate


The proud Grandpa's speech
                                         

Addie and Ella congratulating Chey

                          Mrs. Woodard, Chey's wonderful piano teacher


                              Beautiful cake made by our sweet friend, Blair


Chloe taste testing the food

Thursday, June 09, 2011

Touchdown Taco Dip

touchdown taco dip

This is probably my all-time favorite dip.  It's actually a Pampered Chef recipe I got from my friend, Stephanie, years ago after she made it for her party. 

Your family will love it....and not just during football season!  ;)

Touch Down Taco Dip

Ingredients:

1 can Refried beans (or this homemade recipe
8 ounces cream cheese, softened
1 cup sour cream
2 tablespoons taco seasoning mix
2-3 garlic clove, pressed
1/2 cup (1 ounce) shredded cheddar cheese
1 medium tomato, seeded and diced (about 1 cup)
2-3 green onions with tops, thinly sliced
1/2 cup pitted ripe olives, sliced
1-2 tablespoons finely chopped fresh cilantro
Additional sour cream (optional)


Directions:

1.Preheat oven to 350°F. Spread beans over bottom of 10 x 10 or oval baking dish. In a bowl, combine cream cheese, sour cream, taco seasoning mix and garlic pressed with Garlic Press; mix well.

2.Spread cream cheese mixture evenly over beans. Grate cheddar cheese over top. Bake 15-20 minutes or until cheese is melted.

3.Dice tomato and thinly slice green onions. Slice olives. Finely chop cilantro. Sprinkle tomato, onions, olives and cilantro over dip. Garnish with additional sour cream, if desired.

Yield: 8-12 servings


Photo Credit

Wednesday, June 01, 2011

Trey's Not-So-Secret Brisket Recipe

brisket up close and personal

My good friend, Blair, gave me this recipe for one of our annual church Progressive Dinners.  It was soooo good, it's what we do EVERY time now! You gotta try it!

Ingredients

Any size brisket (the bigger, the better....you'll want to have lots of leftovers for those sandwiches.  Trust me!)

16 oz Lowry's Seasoned Salt
8 oz Cavender's Greek Seasoning (yellow can)
1 tablespoon Meat Tenderizer
1 tablespoon Black Pepper

Directions

Combine all dry ingredients thoroughly.  Return as much as will fit back into the Lowry's bottle.  Label (w/ Sharpie) "BRISKET" on the Lowry's bottle.  Put remaining powder into something suitable and use up first.

Preheat oven to 320* F. 

Using trimmed brisket is fine, but the fat layer on an untrimmed will add flavor and juiciness.

Coat brisket heavily on both sides...don't be shy.  Wrap brisket tightly in heavy duty foil, fat side up.  Needs to be liquid tight.  Cook in 9 x 13 pan.  Bigger brisket equals bigger pan. 

Depending on size of brisket, cook 5-7 hours.  Longer time = tenderness.  Unless it's a tiny brisket...I say go for at least 7-8 hours.

Remove brisket from oven and increase oven temp to 425*.  Carefully, poke holes in bottom of foil and drain all juice into a saucepan.  Open foil and sprinkle some more seasoning on top.  Rewrap and put back into oven.

Cook one more hour and then let rest on counter for 30 minutes before slicing. 

Gravy:  Add water to the juices until desired saltiness.  Dissolve some cornstarch in a small glass of cold water...just enough to make a runny paste.  Bring juices to a boil and add cornstarch.  Stir constantly until thick and bubbly.

When slicing, use a very sharp, non-seraded knife...and slice against the grain.

Serve with your favorite brisket sides.  We like mashed potatoes (for the gravy, of course), a green salad, and our homemade rolls. 

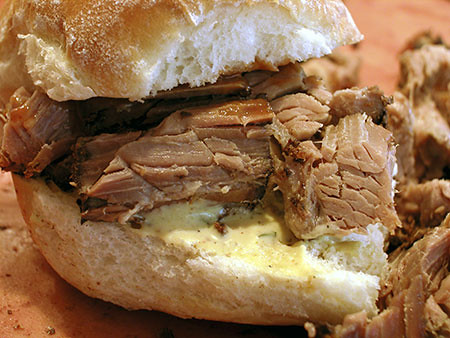
With the yummy leftovers, make a sandwich with a little mayo...oh. my. goodness!

Photo Credit

Tuesday, May 17, 2011

Two Months

Sweet Amelia, Two Months


We just love this little girl more than words can express.  With her big blue eyes and her sweet disposition, she's reeled us in!  She smiles a lot and tries so hard to talk to us with her coos.  She's already rolled over and she's been sleeping through the night since about six weeks of age.  Hallelujah!  Sweet, sweet baby girl!

Tuesday, March 29, 2011

Kids and Gramie

I Just Love This Picture


This picture was taken just before I had Amelia.  It's special because my beautiful mommy was here for the birth and was able to pose with her grand-babies.


And since Amelia wasn't in the above picture, here she is with her wonderful Daddy!

Monday, March 14, 2011

Amelia June

She's Here

We are rejoicing over the birth of our baby girl, Amelia June. She arrived safely on Friday, March 11 at 2:22am. She weighed in at 8 lbs (though we don't think she's that big) and was 20 inches long.

It's hard to believe she's finally here after many months of waiting and wondering whether she was a boy or girl. Labor was long, and difficult near the end, but she was worth every minute of it.

We are humbled by God's goodness, His protection, and His many blessings in our lives. Welcome to our family, my sweet Amelia! We love you!

(Will post more pics soon)

Thursday, March 10, 2011

Egg and Sausage Breakfast Ring

Egg and Sausage Breakfast Ring Recipe

INGREDIENTS


1/2 lb bulk pork sausage
1/3 cup sliced green onions
1/3 cup chopped red bell pepper
5 eggs
1/4 teaspoon salt
1/8 teaspoon pepper
1 package (3 oz) cream cheese, softened
2 cans (8 oz each) Pillsbury® Crescent Recipe Creations™ refrigerated flaky dough sheet
1/2 cup shredded Cheddar-Monterey Jack cheese blend (2 oz)
1 egg, beaten
1 teaspoon sesame seed


DIRECTIONS


1. Heat oven to 375°F. Spray large cookie sheet with cooking spray. In 10-inch nonstick skillet, cook sausage and onions over medium-high heat 5 to 8 minutes or until thoroughly cooked; drain. Stir in bell pepper; cook until tender. Remove from pan.

2. In small bowl, beat 5 eggs, salt and pepper. Add egg mixture to skillet; cook over medium heat, stirring occasionally from outside edge to center. Cook until eggs are set but still moist. Stir in sausage mixture and cream cheese.

3. Unroll both cans of dough. Place dough on cookie sheet, long sides overlapping, to form 14x13-inch rectangle; firmly press edges to seal. Spoon egg mixture down center to within 1/2 inch of edges. Sprinkle with cheese. Starting at longest side, roll up; press edges to seal. Shape into a circle; pinch ends to seal. Cut six 2-inch slits around top of dough. Brush dough with egg; sprinkle with sesame seed.

4. Bake 25 to 30 minutes or until deep golden brown.

Photo Credit
Related Posts Plugin for WordPress, Blogger...